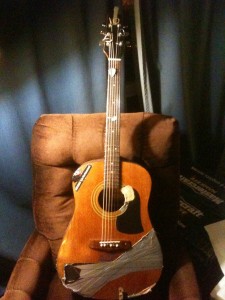
 Last Sunday I decided to put some time into fixing up my old acoustic. It’s the guitar that came with me everywhere throughout high school and the years following. I literally never left the house without it, and it really took a beating over the years because of it.
Years back my family and a bunch of people at a place called the Kilt Pub that I was playing at a couple nights a week all put to buy me a new guitar – a beautiful Washburn. I’ve been playing it predominantly since, but I’ve always wanted to get my old guitar back in good working order. It’s got a lot of sentimental value, and I always loved the tone.
After recording Glenn Leybourne and his rich sounding guitar last week, I felt inspired to get on with fixing up mine.
Bridge Caving In
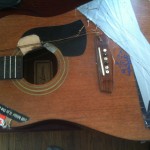 The pressure of the strings pulling on the bridge had been causing a larger than normal dip in the face of the body between the bridge and sound hole. This started many many years ago, and got to the point of causing the a lot of fret buzz. Well, back then I didn’t do a very good job of fixing it. In fact, my ghetto fixing job consisted of cramming a couple blocks of wood inside the guitar as a wedge between the face (sound board) and the back.
This worked for many years, but eventually led to a slew of other problems. First, it started causing the back of the guitar to extrude. Then, because the pressure from the strings was being redirected, it caused the seem between the sound board and the sides to crack.
My early 2000’s ghetto fixing job for that problem was to duct tape it up! I suppose I just thought it didn’t matter at that point. 😀
Fixing It Properly
Well, I really should have just fixed it properly back then. It really didn’t take much time at all. So this time around, I put the time in.
Cleaning
My first course of action was to get rid of the old strings and start cleaning it up! Look at all this dirt!!
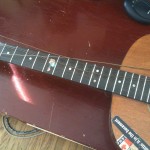
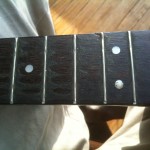
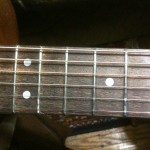
The fret board was easier to clean than I thought it would be, though still took a little time. The best way to clean it is a nice little trick – use steel wool! It has to be very fine steel wool (it should be 0000 fineness) to avoid damaging the wood. But it’s amazing how well the steel wool works!
I also wiped everything down with a sham-wow and some wood soap.
Of course, I had to leave the duct tape and stickers. They’re as much a part of the guitar these days as the strings are!
Fixing Internal Bracing
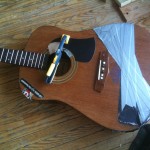 After removing the strings and cleaning things up, I pulled out the old blocks I had within the guitar and inspected the internal bracing. As I suspected, there were problems
The bracing includes a main “X” shape. It turns out this was only connected to the sound board by two of the four points. To fix it, I used standard carpenter’s glue. I used a Popsicle stick and hold the bracing out from the sound board, and then used a thin piece of cardboard out of the recycling to spread the glue between the bracing and the sound board.
I couldn’t reach the further point with a clamp, so I used the internal blocks again to hold the bracing ’til the glue dried. I clamped the bracing closer to the sound hole.
Miscellaneous Fixes
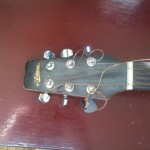
I couldn’t afford new machine heads, so I just took them apart, cleaned ’em up and tightened everything. They’ll suffice for now.
I also fixed a fret that had a dent in it since I was about 16 years old. I throw a large rock into a planter near the Coffee Time we all hung out by, forgetting that I had left my guitar in the planter for safe keeping. 😐
Anyway, it took a while to pry it out, but I eventually got the fret loose with some pliers. I straightened it the pliers and gently hammered it back into place.
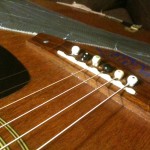
Lowering The Bridge Nut
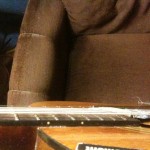
The next morning, after the glue had dried, I threw a new set of strings on it to check the action – which wasn’t very good at all. I had replaced the bridge nut years ago and raised it to compensate for the other problems. It seemed that wasn’t necessary anymore.
But before I filed anything down, I checked to see if I needed to adjust the truss rod. This can be quickly tested by pressing down the first and last fret and checking the space between the frets and the string around the area of the 12 fret. There should be a space, but it should be too small for even a credit card to fit.
It seemed my neck was perfect already, so I moved on to filing the bridge nut. I just used a little sand paper. I put the nut back in and strung it up again.
End Result
I’m so happy with the end result!! The bracing is holding strong – as good as new. The body feels strong again and doesn’t creak anymore! The action is decent. Not perfect, but far better than it’s been in years. The damaged fret works properly again, and the fret board is nearly as clean the day I bought it.
But best of all, it sounds just like I remember it sounding so many years ago! The tone and timbre brings back so many different memories and vibes from all those years of playing countless hours, all night, in myriad places, with so many great people. The reminiscing inspired me to play ’til my fingers were raw. 🙂
It feels great to have my old guitar back in such great condition. At first glance it still looks beat up because, well, in many ways it permanently is. I have no intention of ever fixing the cosmetic damages. They’re just marks of the years of service. They’re battle scars. Like the duct tape and stickers, they’ll remain until the guitar crumbles to dust and ceases to be.
But structurally, and tonally, she’s back in her prime! I can’t wait to use it on some recordings. I’ll be sure to share them with you when I do.

Reading this made my day, it’s nice to read about someone getting re-acquainted with an old friend.